 Got water damaged floors? As experts in water damage repair, here’s a guide on how to approach the clean-up, by floor type.
If not handled quickly, water damage can destroy your floors and get into the sub floors. Regardless of your floor type, the first step in any water damage scenario is to find and fix the leak quickly. Once that’s done, follow our water damage repair guide to see how to properly repair any type of flooring, from hardwood and laminate to carpet.
Dry it out
No matter what type of flooring you have, it’s vital to fully dry the area before repairs can begin. If you’re dealing with large pools of water, use a wet vacuum, then put dehumidifiers and fans in the room for a couple of days. In mild cases, this will be enough to fix the damage.
Hardwood floors
First, identify all signs of water damage, such as cupping, dark spots, bulging or buckling. If only a few boards are affected, you can most likely nail or screw them back in place.
If the damage is more serious, use matching wood and replace the individual floorboards. For excessive water damage, you may have to cut the affected area out using a saw. Once this is done, use a pry bar to remove the floor planks.
If you’re dealing with solid wood floors, make sure you replace the boards first, nail them to the floor, then sand both the new and old flooring. This way, they’ll match perfectly before you stain them. Once you’re ready to stain your wood floors, apply several coats, then several more coats of polyurethane finish.
Some damage is so bad that it’ll actually cost less to remove the entire damaged floor instead of trying to repair the area.
Laminate Floors
While laminate finish is water-resistant, when water does get in through a leak, the internal materials will absorb the water, leading to swelling and separation beneath the finish. If you’re dealing with major flooding, like a basement flood, you’ll have to replace the entire laminate flooring.
For mild to moderate flooding, the water damage repair process is a little simpler. You may be able to salvage some flooring sections. Once the floor is dry, you’ll be able to examine the damage and determine how much needs to be repaired. If you’re dealing with smaller damage, you can simply replace the affected boards.
Carpets
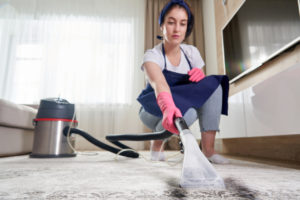
An upside to having carpets is that they can handle a large amount of water, though it’s important to dry out your carpets quickly to stop mold and mildew growth. Your best bet to salvage your carpets is to rent a carpet cleaning machine, which will extract the water fairly quickly. This may also be a good time to call in a professional floor care company.
Once you’ve dried your carpets, have them professionally cleaned. At this point, you’ll have an idea of whether or not you’ll need to replace the carpets.
Tile Floors
While it’s true that tile is water repellant, significant flooding can cause water to seep in through the cracks in the grout and cause damage to the subfloor.
After your floors are dried well, access the damage. If the subfloor is fine but some tiles are loose, simply lift the tiles from the floor with a standard head screwdriver. When replacing the tiles, make sure to match the new grout to the old grout as closely as possible.
Vinyl and Linoleum Floors
Once you’ve dried your floors (try using fans and increasing the temperature on your furnace), identify which sections need to be replaced. First, cut out the damaged portion with a utility knife, then use a screwdriver to pry the tiles off the floor.
Watch out for damage to the subfloor. Once water gets in, the wood can swell and shrink when it dries.
Repairing damaged subflooring
First, use a circular saw (set to 1 inch depth) to get rid of the damaged portion. Next, take out any protruding nails using a pry bar, then vacuum any debris. If you notice the area under the subfloor is still wet, dry it fully.
You’ll want to use 2 x 6 lumber as your floor frame, which will support the new subfloor. You can use a piece of ⅝ inch CDX plywood as the new subfloor, just make sure to cut and measure it carefully. Leave a ⅛ inch gap between the subfloor and the new plywood. This will allow for expansion.
Your last step is to use galvanized 8d nails (deck screws would also work) to fasten the new plywood to the framing.
Don’t make it complicated
Flood-damaged flooring can be difficult to deal with, but if you take the right steps and dry it thoroughly, you should be able to salvage your floors. For excessive flooding, consider reaching out to a professional to ensure quick and effective water damage repair.
Need a restoration specialist? Touch With Care’s highly experienced team is prepared to act quickly across Toronto and Mississauga. We respond within the hour to limit the possibility of water damage, electrical dangers, the growth of mould and bacteria, and structural harm to your home or business. Contact us when disaster strikes.


